Hey there!
I get asked a lot about my food photography equipment, lighting techniques and tips for food styling. Therefore I’d like to dive into this subject matter and help you become better at food photography.
Since 2015 I work as a freelance photographer and work with customers blog-internal as well as external. I usually do both food photography and food styling at once – yet sometimes it happens that we split it up.
Before we’re talking food styling, props and other pretty chichi we need a solid, technical base. I know, I know. Doesn’t sound to exciting, but trust me. You’ll get to the fun part very quickly (also read my rant about technology nerds in the end).
As I said, we need a technical base knowledge and therefore I’ve written this extensive “Food Photography Gear Guide” for you, which I created around my yearslong experience and my journey of collecting and building my very own little food photography studio.
I’ll warn you right from the beginning: This guide is rather lengthy, like really, really detailed and introduces you to all the different options with which you can approach this topic. Just pick and choose what appeals to you the most.
It’s just natural that a beginner food photographer has to make his / her own experiences and consequently collects his / her perfect equipment based on that.
Please don’t hesitate to ask me any question if you feel lost or find something is missing (if you do that in the comments, others can benefit from this as well)
For a better overview I created a table of contents from which you can easily skip to all the topics that interest you the most.
This post contains affiliate links. Purchases made via those links won’t cost you a penny more, yet recompensate me with a little commission. Consequently, if you like one of the presented products I’ve be ever so grateful if you purchased it via my links as a form of appreciation for the work I put into this guide.
Don’t forget that each supporting of a small company or blog will lead to a real person doing a happy dance (at least that’s what I’ll do)
Let’s start with the most important thing in photography. In this guide I will focus a lot on different lighting techniques, since:
The base of everything in photography is light – which is already engraved in its Greek word root: photós : light; graphein = drawing, painting
If we don’t care for (“good”) lighting we don’t even have to get started.
We’ll be dealing with both, natural light – the inexpensive first choice – as well as artificial light. Flash lights and daylight lamps to be precise. Also, as a conclusion I’ll list all the pros and cons of each light source for you.
Natural light aka the sun is usually the first choice for most beginner food bloggers and photographers. And that for a good reason. Natural light doesn’t cost you a penny, you don’t need to make space for storage and it has one big advantage:
It looks natural.
The following photograph of a chocolate cake for example was taken with natural daylight. The sky was a bit clouded and I chose to light the cake from behind and sideways. The result is a beautifully lit cake that shows a lot of texture and depth. 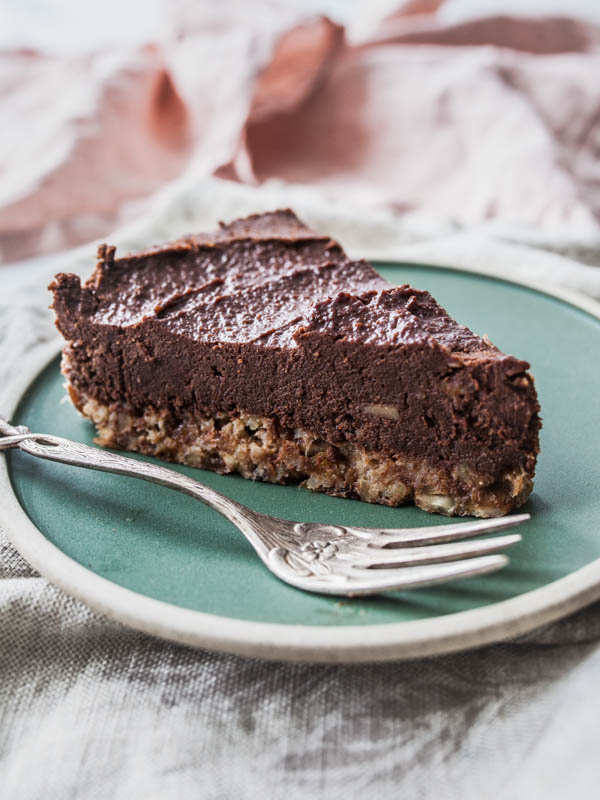
I personally like natural light a lot, especially when it does things I can’t (yet) reproduce with my own equipment, such as super soft light during the blue hour or a marvellous sunset.
Working with natural light in food photography is surely a great thing until:
Many beginners don’t dare to use artificial light or put it off indifferently because artificial light will ‘ALWAYS look artificial!”
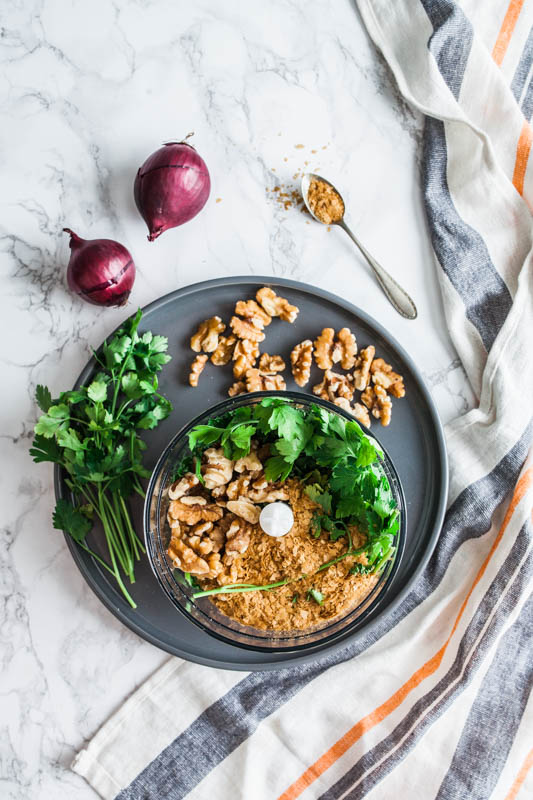 This light and airy ingredient shot must have been shot with the brightest daylight, right? Gotcha! I lit this photo with a huge umbrella (around 1,20m / 47 inches in diameter)
THE ART OF MAKING ARTIFICIAL LIGHT APPEAR LESS ARTIFICIAL – THAT’S TRULY AN ART!
Let me tell you something.
Artificial light only looks artificial, if you can’t handle it.
And now burn.
Flash light
I started my journey into artificial lighting with a Canon speedlite which I’ve been using for several years (and still am). According to befriended photographers Yongnuo Flashes are quite recommendable as well – for a much more affordable price.
I love working with flash lights because
One disadvantage kicks in if you do videography. It’s not possible. Therefore, for filming I got myself some daylight lamps.
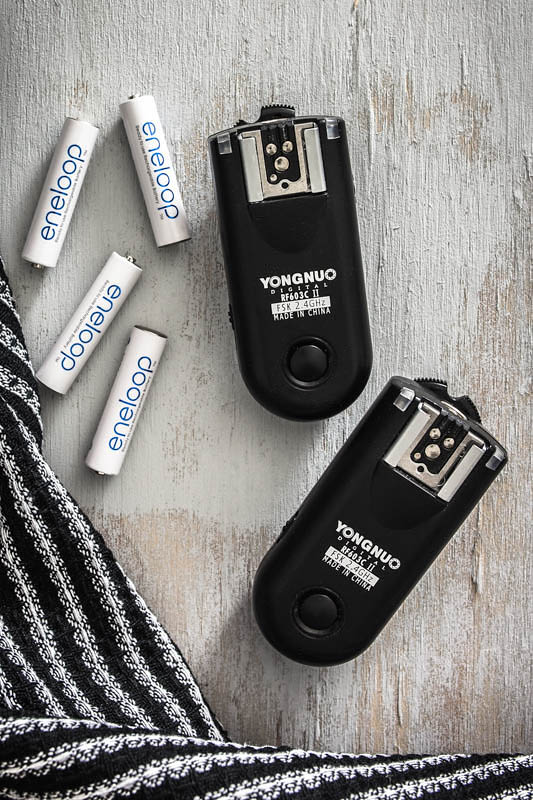
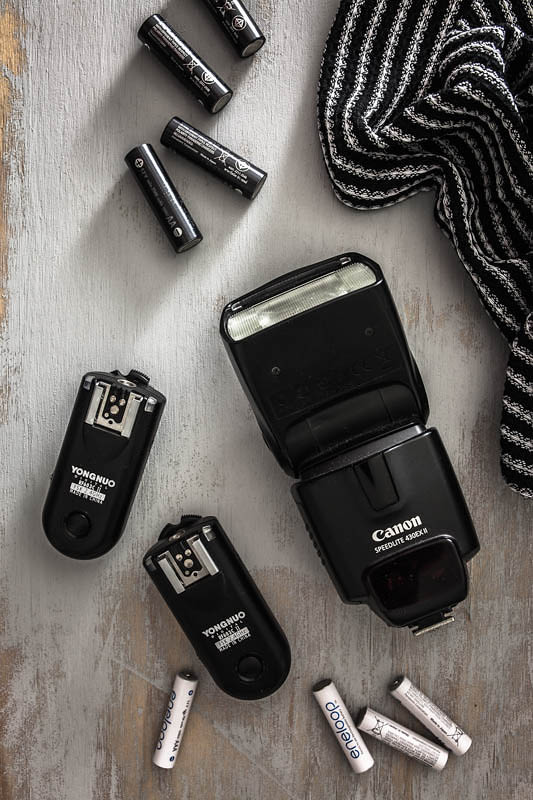
Yongnuo Wireless Remote Flash triggers. One trigger goes on top of your camera, the other one underneath your flash. That’s all you have to do in order to fire your flash from any desired position. My favourite rechargeable batteries for those triggers are from Eneloop. They seemingly last forever and are quickly recharged.
Canon Speedlite
I’ve been using this for years and it’s still working perfectly. It surely is an investment that’s worth the money. (Note: I own the Speedlite 430 EX II, which you might find used on Ebay or the like)
Yongnuo
If you’re not ready spend a big amount of money yet, you might want to try a flash from the brand Yongnuo. I personally don’t own one (since my Speedlite is still working perfectly ^^) but some photographer friends use it and so far I only heard positive voices.
Wireless Remote Flash Triggers
Since firing your flash from the top of your camera is a big NO-NO in food photography you need to invest in a wireless flash trigger. I love the flash triggers from Yongnuo as they are easy to set up and rather affordable.
Flash mount and umbrella holder & Light Stand
These little gimmicks are a game changer and I waited way too long to invest in those and balanced my flash on rickety laundry-basket-stool-constructions instead. Don’t be as stupid as me, and get a tripod and holder for your flash 😀
Durable + rechargeable batteries for flash (AA) & flash trigger (AAA)
If you work a lot with your flash you’ll notice an increase in your battery consumption. I found that rather annoying and bought the rechargeable batteries from Eneloop. They are super durable, quickly charged and definitely worth their money.
Another highlight: The cases and charger can hold both sizes, AA and AAA, hence you don’t need two chargers but only one. Yays!
Some photographers like flashes, others prefers lamps. In the end you chose what appeals to you the most.
Daylight lamps are relatively inexpensive and quickly ready for use.
The temperature is usually neutral (5000 – 5500 K) and not adjustable. Therefore, if you’re working with those lamps you shouldn’t have any other lights on that could interefere with it or you might end up with hard to edit blended light. You should also get a curtain if the natural light is all too strong.
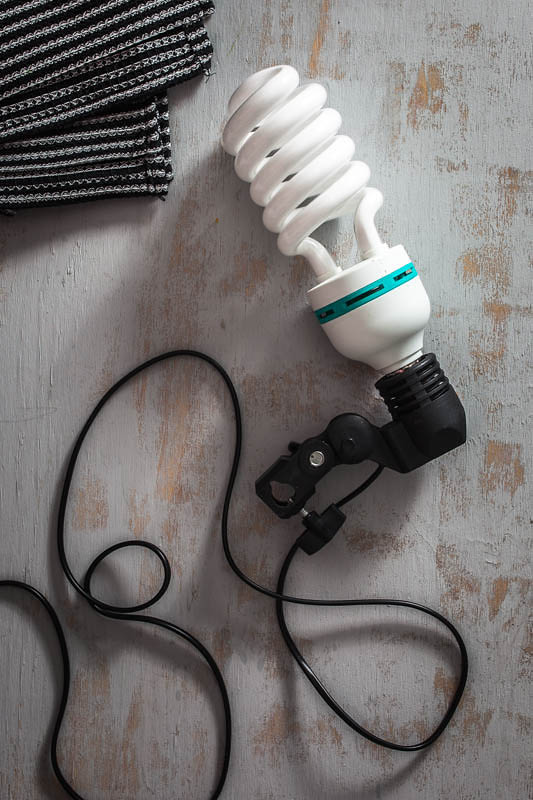
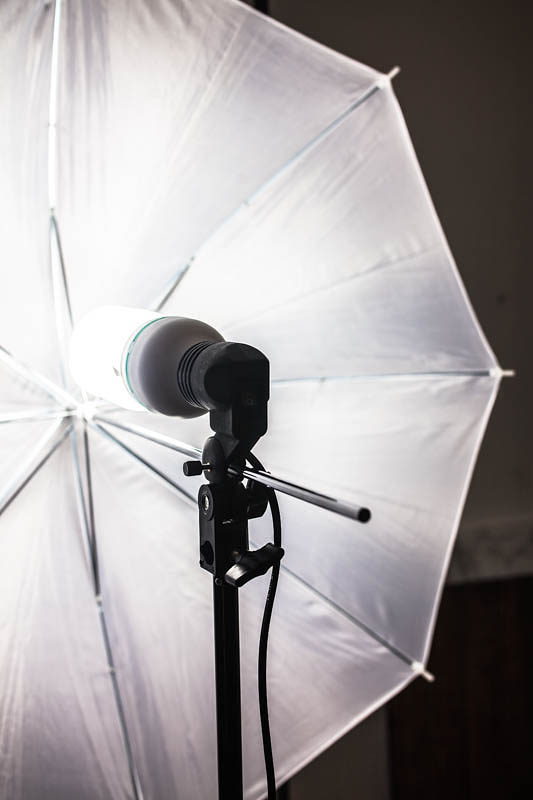
A daylight lamp mounted on a lamp holder
For my first steps with daylight lamps I purchased a practical lighting kit consisting of 2 umbrellas, 2 light stands and 2 daylight lamps. It was much cheaper compared to buying everything seperately and therefore a great investment if you’re starting from 0.

If you’re absolutely equipment-less things can get expensive rather quickly. Then it’s worth thinking about buying a starter kit which contains a lot of gear that you’d otherwise spend much more money on if you bought it separately. This set comes with 2 umbrellas, light stands and lamps – a perfect starting point for food photography and videography.
3 in 1 Mount for Flash, Umbrella and Lamp
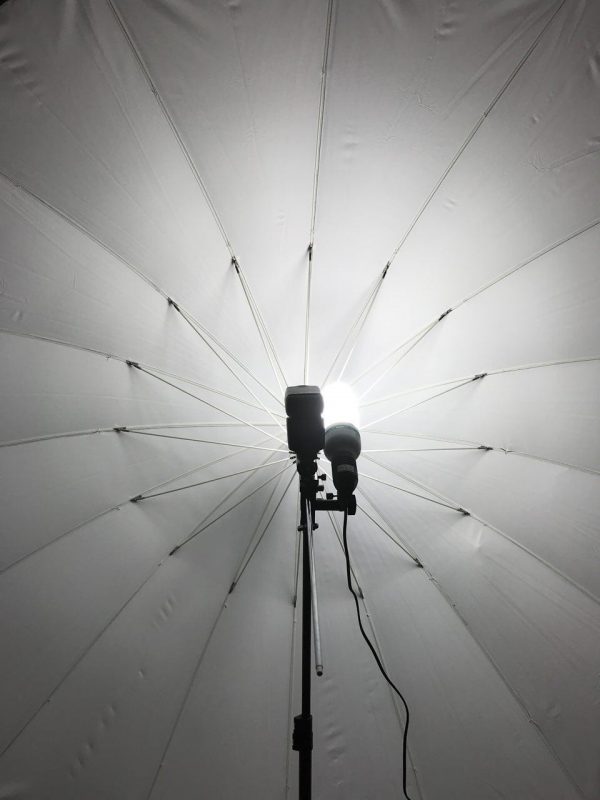 Very practical: A 3 in 1 solution that holds an umbrella, a flash and a light bulb. This might be of interest for you if you want to film while also photographing your set up with a flash. Or, if you want to simulate your desired lighting atmosphere before you fire the flash.
+++ free
+++ natural look
+++ videography is possible
— inconsistent
— you might need a higher ISO or a tripod, when it gets too dark
+++ consistent
+++ always available
+++ you can create all different kinds of looks (natural, artificial, hard, soft, dramatic…)
+++ the shutter speed is consistent and short
+++ energy supply via batteries – no socket or cables needed
— videography is not possible
— more on the pricy side for beginners
+++ consistent
+++ always available
+++ you can create all different kinds of looks (natrual, artificial, hard, soft, dramatic…)
+++ videography is possible
+++ starter kits are highly affordable
— depending on the power and distance of your lamps you might need a higher ISO or a tripod
— energy supply via cable
What would a light source be without a proper light shaper? Basically an akward and clumsy beam of hard light without any sense and purpose
Whether it be the sun, a flash or a lamp, we always have to make certain design decision for which we have to chose a suitable light shaper.
Do you want your food look light and airy? Or are you aiming for a dark and moody atmosphere? Do you want the shadows to be hard or soft? Or do you want no shadows at all?
Which light is the most flattering for my dish? And how do I work out the most important details with my lighting?
It might sound challenging, I know. But practice and experience will get you there step by step. Let’s start with understanding what light shapers do and which kinds there are.
A light shaper does exactly that. It shapes light. A light shapers is an important tool for every photographer, which allows us to bring our artificial light into a desired shape that creates exactly the mood we want to achieve.
Therefore we can manipulate the hardness (or softness) of our light, how far it spreads, how big or small the light area is and even which colour it has.
There are countless kinds of light shapers, with which you can achieve the most wondrous results. For this guide we’ll concentrate on light shapers that are the most suitable for food photography beginners.
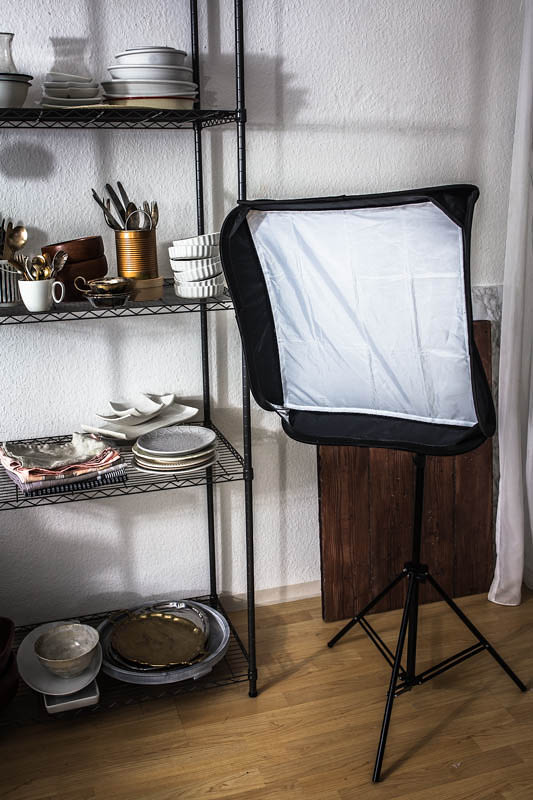
A softbox is one of the most common light shapers and allows you to light your subject evenly and makes the shadows softer. It usually is made up of fabric and let’s the light through in only one direction through a transluscent, white fabric.
This light area can either be rectangular or square but there are also softboxes with six or eight corners.
Compared to an umbrella they have one big advantage: They only spread light in one direction. This is extremely valuable when you’re shooting in small rooms with low ceilings.
Softbox 24×24 inches / 60x60cm for photo flashes
Octagonal umbrella-softbox 47 inches / 120 cm for photo flashes


A photo umbrella works almost like a softbox and lights your subject evenly, making the shadows softer. Umbrellas are usually much more affordable than a softbox and are easier and faster to set up.
There are two ways of lighting with an umbrella.
Again, if you’re shooting in a small room with low ceilings I’d recommend to go for the second option to remove all too much light spreading across your room, from your ceiling and onto your photo subject, since this will tamper with your desired lighting mood.
2 photo umbrellas 33 inches / 84 cm
Umbrella black – white 43 inches / 109 cm
Umbrella black – white 45 inches /115 cm
My newest achievement is this cute, little photo umbrella. With its 180cm / 70 inches in diameter it barely fits in my apartment, but it’s absolutely worth it 😀
An absolute trendy must-have for every photographer. Nothing is more versatile, affordable and practical than a reflector.
You can always use a collapsible reflector for natural light as well as artificial light:
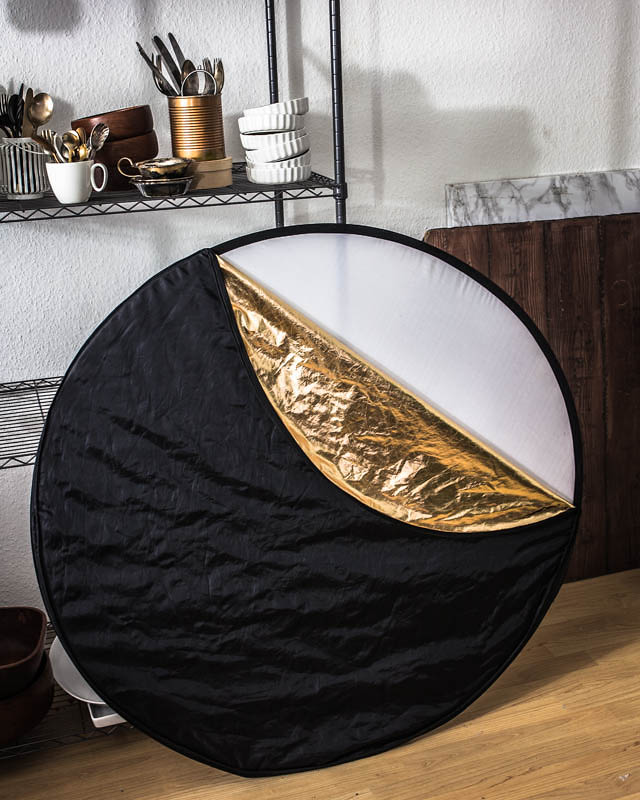
Enables you to reflect light onto you subject and lighten it from the opposite site of where the main light source is.
If you remove the coat around your reflector you’re left with a practical translucent fabric that you can place in front or your flash, lamp or fenster to soften the light.
Sometimes you don’t want to have light in a particular area of your photo to make it a little more moody. In this case you can use the black surface of the reflector as a shield.
Too broke to buy new equipment? Get creative and experiment with different materials.
A piece of white cardboard or styrofoam can serve as a reflector, black card board shields your subject from too much light.
White curtains or bed sheets can become your DIY diffusor for the softest light.
Coloured foils, aluminium foil or rescue blankets can be used as reflectors to make your setup appear lighter, warmer or cooler.
Just use your imagination and discover the potential that lies in everyday objects. If you put some more effort into it you might even craft your own softbox or reflector.
There are some things that are not deadly necessary, but which will make your life a whole lot easier. Just like the following:
If you’re looking for a good tripod always keep in mind that this piece of metal will hold your most important tool. It should in no way appear instable or rickety.
While food photography surely isn’t the most dangerous and risky field, and we’re not exposed to hurricane-like gusts of wind or fast approaching, flying objects, it should be able to handle some tripping and poking.

The same goes for the tripod head. A ball head or 3-way head should bring a certain stability and hold the weight of your camera and lens without moving at all.
I don’t have a specific recommendation. There are so many great tripod brands out there. Compare the brands and prices and – most important – have a look at them ‘for real’.
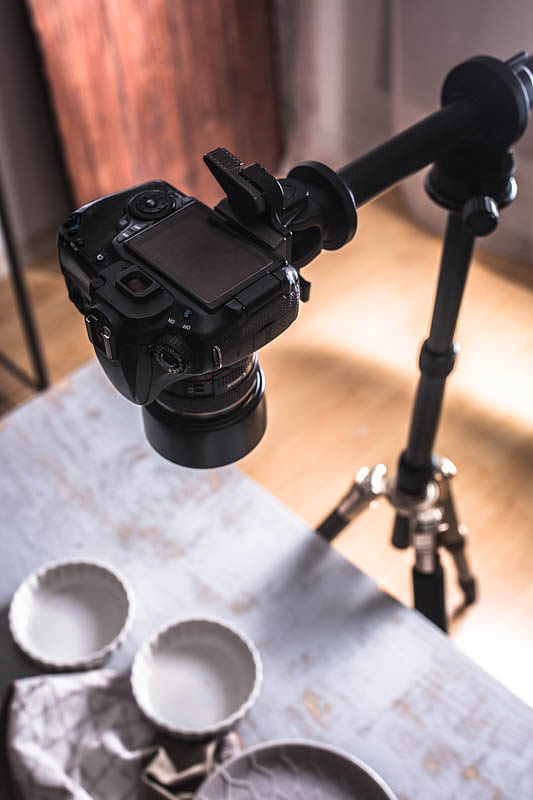
A tripod arm is a game changer.
Wenn photographing food you probably won’t get around shooting from the birds eye perspective.
The time b.ta. (= before tripod arm) was a very creative era where I tried my very best to get as much birds eye perspective with as little tripod legs as possible. It was always a struggle, and a very rickety one on top of that.
And for that reason a tripod arm is my number 1 recommendation (even before the collapsible reflector). It truly changed my life.
It can come in quite handy to be able to release your camera via remote. When you’re shooting with long exposures for example, or for videography in order to prevent shaking the camera.
Sometimes you might end up with a very bulky light setup or a camera which hangs somewhere under your ceiling and you don’t want to play a round of twister for every release.
In this case a remote is very valuable and there are several options via cable, with an app for your smartphone or a tether cable.
A tether cable (basically a very long USB cable) let’s you shoot and safe your photos directly onto your laptop or computer.
I use Lightroom for a Tethered shooting and while it’s not the most reliable software for tethering, I am okay with it.

Tethered Shooting has quite some advantages
When buying a tether cable make sure that you choose the correct cable port.
Only two chapters to go and we’re through.
My editing software of choice has always been Adobe. I started off with photoshop and am using Lightroom since it first came out.
An extensive review and tutorial on how to edit food photos would definitely break the mould right now. But please let me know if you’d be interested in more posts about this topic 🙂

I’m merging those to topics and deal with them at the very end of this guide because the choice of a camera and a lens is one of the least important factors in my opinion – as contradictory as this might sound.
Having a good quality camera and lens is definitely a solid foundation but no requirement for good photos (and surely no garantuee)
“You wouldn’t reduce a chef to his / her pans and pots either, right?”
The most important thing when chosing a camera or lens: You have to feel comfortable when working with it. Your camera is your tool that get’s you somewhere – therefore it needs to fit just like a new sweater and shouldn’t make your life harder than it already is 😉
The photographer is taking the photos, not the camera
You can buy a high end 4-digit camera and still take miserable photos.
You can own the most expensive camera lens available and your photos will still look mediocre.
Todays quality standard for digital SLR or mirrorless cameras is ridiculously high that you can ‘basically’ take any camera to get started (just my two cents – I know that other people tend to think differently).
Here is what REALLY COUNTS:
Only then comes the technical aspect. The technical foundation is a means to an end.
Of course you must know how to set up your camera and lighting equipment!
That’s the point where all the fun begins.
As soon as you know your equipment and how it works in and out without having to think about it anymore (Which aperture do I need? How long is my exposure? How the H*** do I operate my flash?) you can concentrate on the most important thing – your subject. On the photo you want to take and show the world (or keep for yourself, who knows 😉
From this point on you can concentrate on the lighting mood, composition and food styling, without being hindered in your work by technical issues.
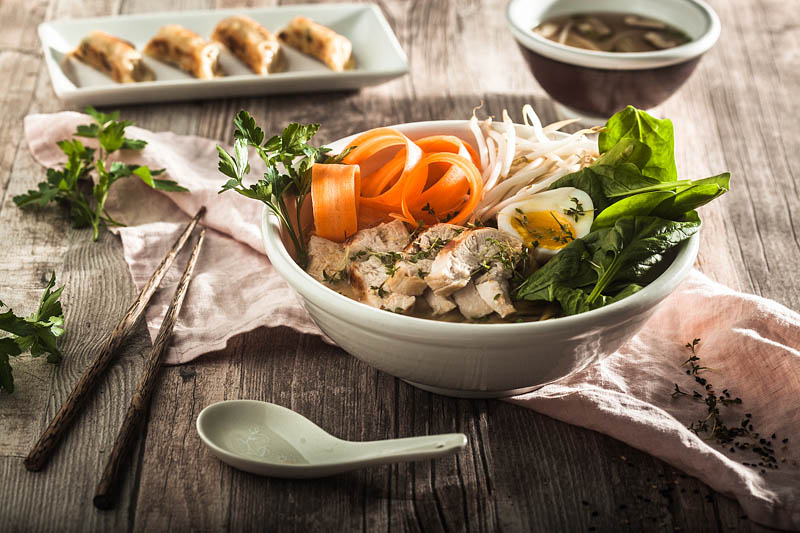
The technical foundation should always be a means to an end. This is one of my all time favourite shots for the MoschMosch restaurant and shows a bowl of fresh ramen. The moody atmosphere was created with a softbox in the back.
For two years and counting I am working with a used Canon 5D Mark II that I purchased on Ebay.
Apart from that I still own my first camera, a Canon 450D (Rebel XSi) and a Canon 60D (with a handy flip screen) that I still love to use for videography.
Additionally I use my iPhone 7 for videography as well. That camera… geez it’s so good.
I have written a whole new post about food photography lenses. Check it out!
Good job! You’ve worked through all topics and your head must be buzzing.
What now?
Relax. Let all that information sink in and if you have any questions feel free to ask!
The recommended products are all stuff that I’ve either used myself (or still use) or which I’ve talked about intensely with friends. I would never recommend anything of which I wasn’t strongly convinced that it could help you on your way to world domination taking the perfect food photo.
Over und Out.
Please feel free to leave feedback, questions or additions to this topics. I’d also love to know which topics you’re interested in or what causes the most difficulty for you.
6 Responses
Best photography tips! Thanks! I always want to have a tripod arm…which one do you recommend? Will it work for any tripod?
Hey there Angie!
Thank you so much 🙂
I’ve linked to one arm I‘d recommend (it’s actually two different links, one to German and one to US Amazon – where are you from?)
It should actually work for every Tripod as long as you can remove the tripod head since it’s secured onto the screw.
I am currently travelling without a tripod and can’t make measurements. Let me know it you have any further questions 🙂
An amazing guide and makes me feel good that I actually have a lot of this equipment, just need to learn to use it as I’d love to have a go at some more food photography – especially while travelling.
Would you be willing to share a couple of behind the scenes type shots?
Thanks!
Thank you Natasha!
I’m absolutely willing to share behind the scene shots and write posts about it 🙂 Since this whole food photography topic is rather new I apologize that it might take a while until I gathered a really big collection with helpful ressources for you. Please bear with me D:
Wauw this is such a cool article, must have been a lot of work! Thanks for all your tips!
Thanks a lot for your feeback Susanne 🙂