Let’s talk about light. Since I get asked about this topic a lot I’d like to introduce a new series on this blog and take you a little behind the scenes and share some of my food photography lighting tips with you. In these mini food photography tutorials I will show you the story behind the shot, focusing on how I achieved a desired mood with the help of either natural or artificial lighting.
As I already explained in my Equipment Guide light is everything in photography. Before you waste any energy on choosing the right backdrop, food props and the appropriate garnish for your food you should get your brain cells working and think about the light and mood you want to create.
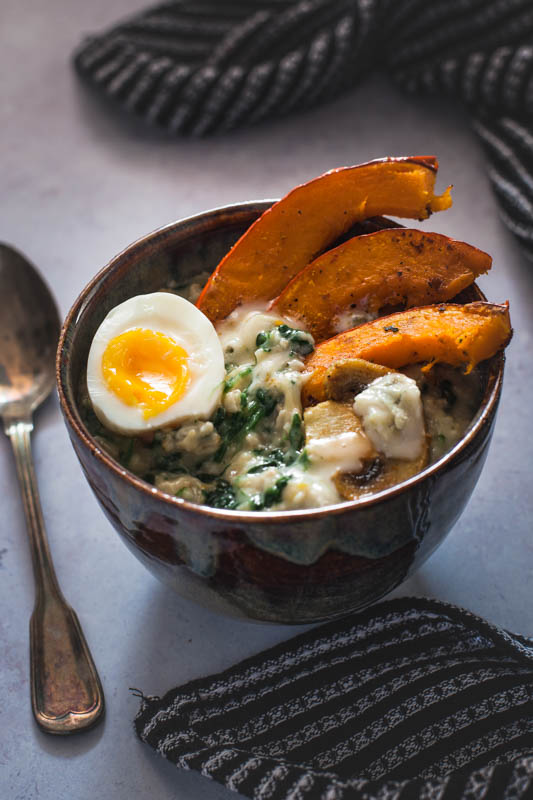
Let’s start with this savoury porridge bowl I shot a while ago to get into the autmn-y mood. For this shot I wanted to create a soft and gloomy mood. I chose to shoot with backlight which would not only help me achieve the mood but would also add lovely highlights at the edge of the bowl, on the egg and the pumpkin.
There are foods that are easier and those that are extremely hard to photograph. Think ice cream, juicy, shiny meat, casseroles, soup. This porridge bowl was an easy to medium photo subject. I just had to make sure to put it into the scene as fresh as possible, to have the food glistening in the backlight. Porridge can look dry and dull very easily, so make sure to serve it prior to shooting.
In order to get the food fresh on the table you should be done with all your preparations in advance. I tend to make test shots in advance to figure out the perfect light, composition and angle for my photo.
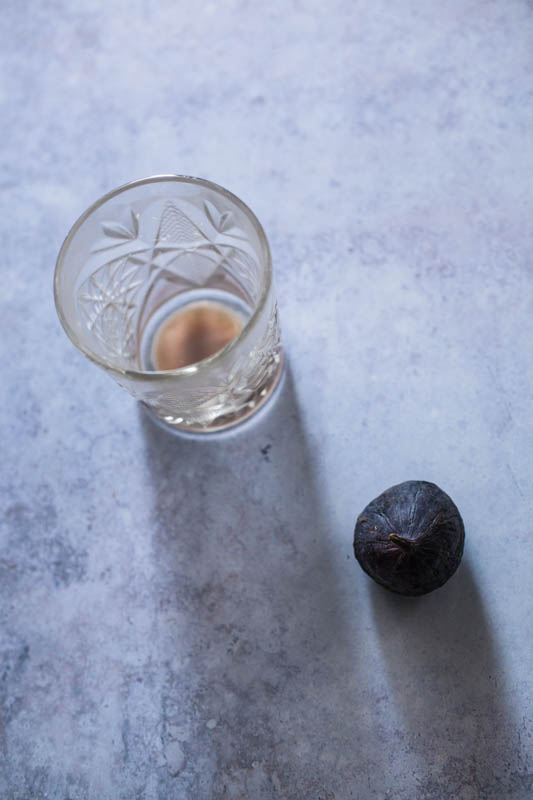
In this case I made my light test shot with what I had available. A dirty glass and a wizen old fig. But it was enough to observe the shadows and general mood.
I am blessed with a huge glass front and windows that reach from the floor to the ceiling. However, in order to achieve a more moody look with soft, dark shadows I usually have to occlude about 2/3 of the windows with a dark curtain. For this setup I even placed one of my food backdrops in front of the window to keep even more light outside until I had a rather narrow slit left where the light could shine through. This resulted in long, intense but soft shadows.
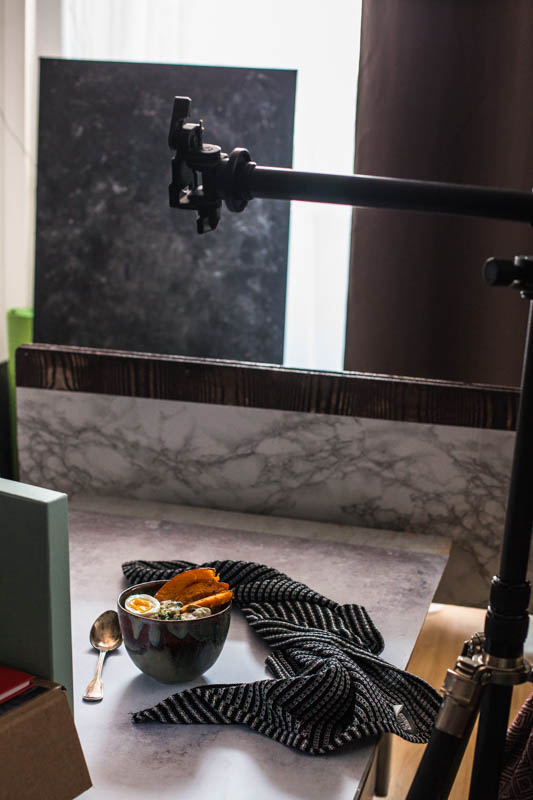
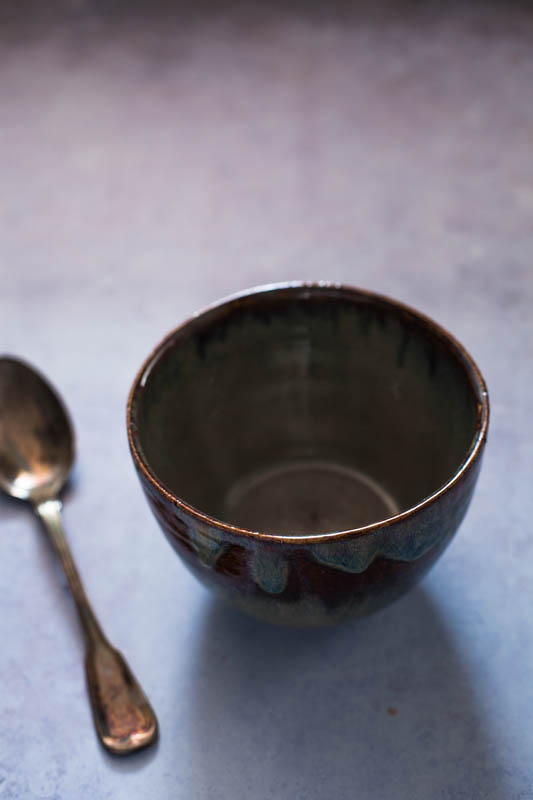
After that I took the original bowl I planned to shoot my food in and prepared the scene around it – which I kept really simple this time – as well as found the perfect angle to photograph from. When all these things were more or less arranged, only then did I start to prepare my porridge bowl.
Quality of light >> Backlight, diffused (indirect light on a cloudy day, window facing west)
Light source >> Natural light, diffused with a light white curtain
black curtain and boards used to make the light source smaller
Shadows >> soft & light
The soft shadows are achieved by diffusing the light source with a curtain and setting the scene ~ 2 meters way from it
To make the shadows lighter a small, white reflector was placed in front of the bowl to lighten shadows and darker parts of the bowl.
Angle >> 45° angle to capture the beautiful highlights and reflexes on the egg yolk, pumpkin slices and rim of the bowl.


Canon 5D Mark II
Tether cable (to shoot directly into Lightroom)*
Simple cardboard as a reflector
White translucent curtain & Dark grey curtain
I hope you found this little tutorial helpful. If there are any open questions feel free to ask.
If you’re on Instagram you can follow me and / or share your food photography creations by tagging them with #purpleavocado or @purple.avocado
Happy shooting and munching!
Info & Transparency | Links marked with an *asterisk are so called affiliate-links! If you buy a product via this link you support me and my work on this blog with a small commission. Obviously this won’t cost you a cent more, but I see it as an appreciation for my work. I will only recommend products and services, which I use myself and with which I am fully satisfied.